Buttermilk-Brined Roast Chicken
About this Recipe
By: Rachel
If you’ve never tried buttermilk-brined roast chicken, you’re in for a flavorful, juicy upgrade to your usual dinner rotation. This simple technique creates incredibly tender meat and crisp, golden skin—everything you want in a perfectly-roasted homemade chicken.
If you like this buttermilk-brined chicken recipe—which you will!—then be sure to try my Buttermilk-Brined Thanksgiving Turkey. You’ll be a hero for many Thanksgivings to come!
Buttermilk-Brined Roast Chicken: Your New Go-To Dinner Recipe
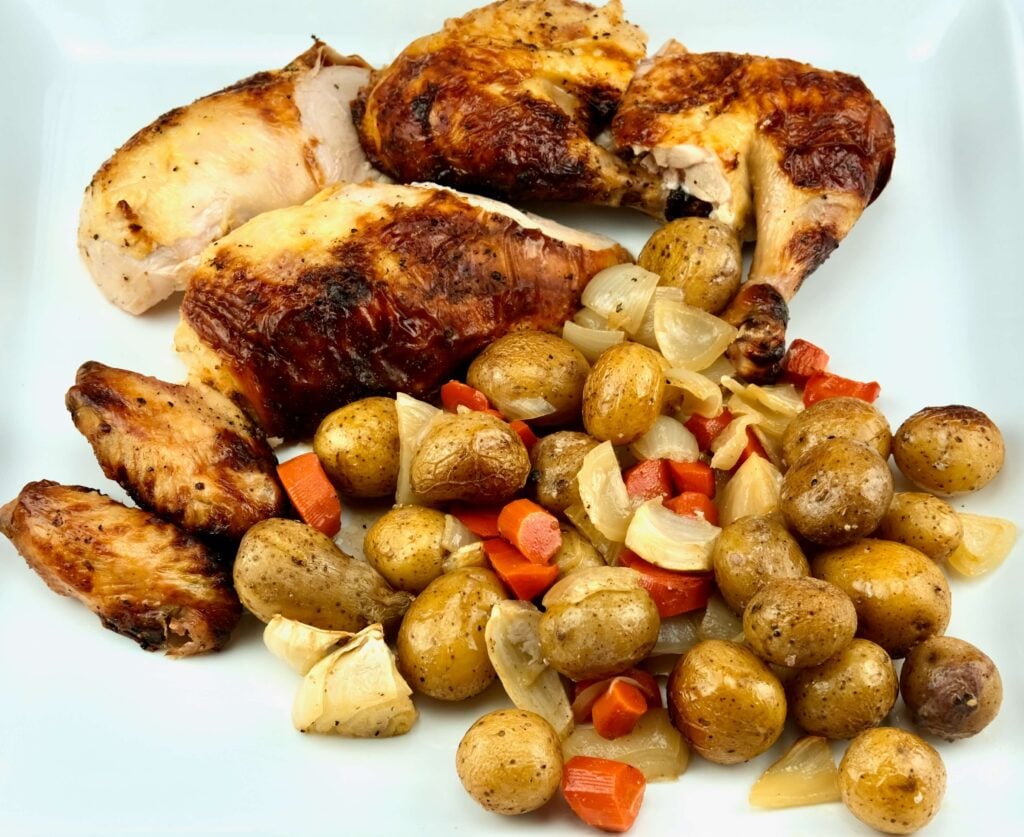
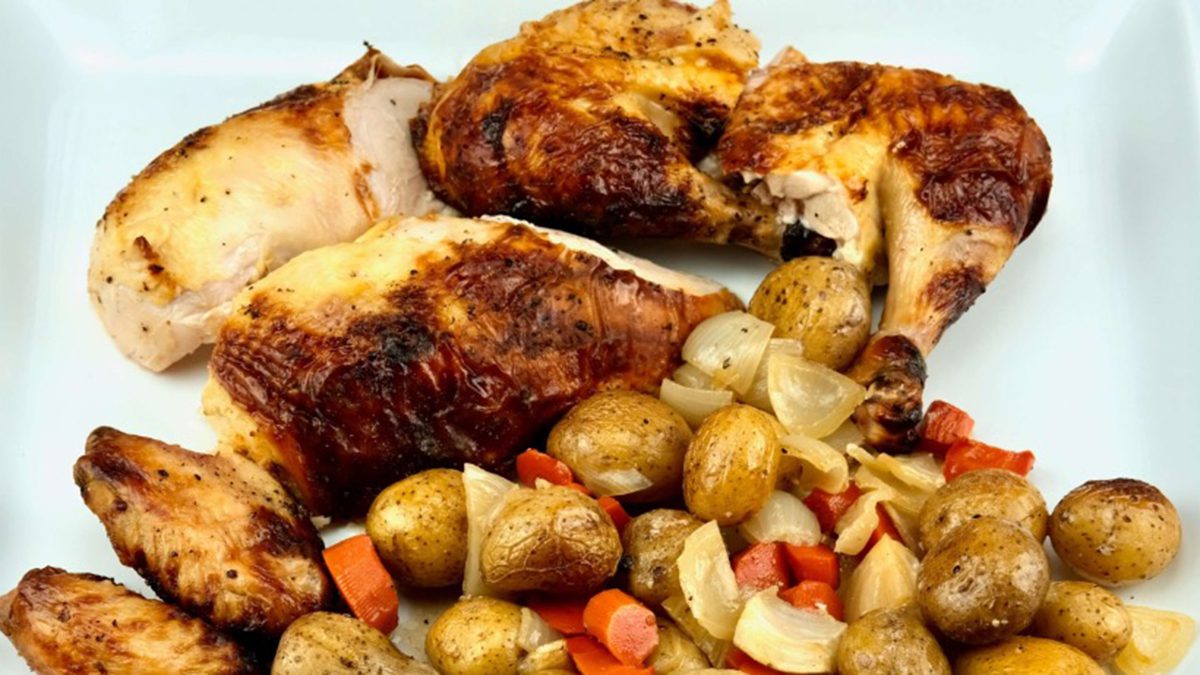
Every cook needs a go-to roast chicken recipe. Chicken and vegetables are one of the most perfect meals—especially juicy, whole-roasted chicken with crispy, browned skin. This dish features fall favorites like potatoes, carrots, and fennel that slow-roast in white wine and drippings. It is a wonderful dish for a chilly fall or winter evening, and elegant enough for company.
Why Use Buttermilk for Roast Chicken?
Many chicken recipes benefit from acidulated dairy products—like buttermilk or yogurt—to add flavor to meat while also breaking down the protein. The result is a more tender, juicier bird. Countless Southern fried chicken recipes begin with a buttermilk brine. If you’re a fan of Indian food, note that many chicken recipes begin with an overnight marinade in yogurt flavored with wonderful aromatics like ginger, garlic, and spices.
What Makes This Easy Buttermilk-Brined Chicken Special?
There are plenty of roast chicken recipes out there, but this one stands out for its depth of flavor and beautiful texture. If you haven’t tried buttermilk-brined chicken yet, you’re in for a surprise. This simple ingredient, paired with a thoughtful technique, creates something truly worth gushing over.
The buttermilk and yogurt not only help the chicken become more tender and juicy, but the natural sugars in the dairy also caramelize during roasting—resulting in the brownest, crispiest chicken skin ever.
Samin Nosrat’s fabulous roast chicken inspired this recipe. She utilizes both buttermilk and yogurt for the ultimate in juicy, tender meat and deeply bronzed skin. The chicken sits atop a bed of roasted vegetables and white wine, so as it roasts, a fragrant, concentrated jus develops.
How to Serve Roast Chicken
Once your buttermilk-brined roast chicken emerges from the oven—deeply golden, surrounded by tender vegetables and a pool of rich jus—it’s time to serve it up right. I like to dip warm, fresh challah bread into the chicken jus before digging into the chicken and roasted vegetables. To me, it is true comfort food; the ideal meal for a Friday night at home.
The savory jus, infused with white wine, roasted garlic, and the rich drippings from the buttermilk-brined chicken, soaks beautifully into a bread. This makes every bite irresistible. It’s a meal that feels both rustic and indulgent, perfect for sharing around a cozy table.
For a bright, fresh dish to add lightness to your meal, try this Winter Citrus Salad. And if you happen to have leftover chicken, this chicken salad is my favorite way to use it for lunch the next day!
Beverage Pairing
By: Olivia
A beautiful, juicy roast chicken with root vegetables such as this deserves an equally beautiful wine pairing. Chenin Blanc is a great choice because it is incredibly versatile and can showcase different elements of this dish, depending on your preference! A French Chenin Blanc, particularly from the Loire Valley, will highlight the acidity of the marinade and effectively cut through the richness of the jus. Conversely, a Chenin Blanc from South Africa, which tends to be richer in style, will emphasize the deeper flavors in this dish, like the roasted vegetables and caramelized, crispy chicken skin.
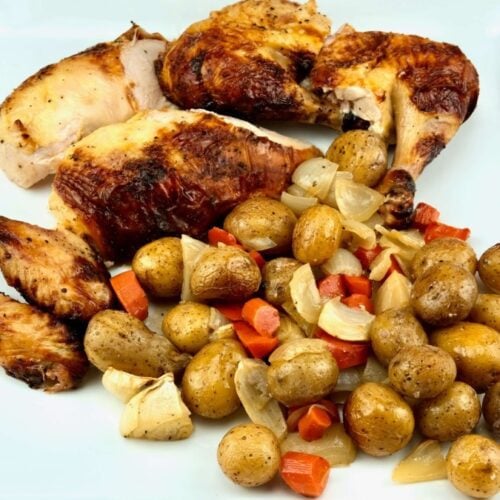
Crispy-Skin, Buttermilk-Brined Roast Chicken with Root Vegetables
Ingredients
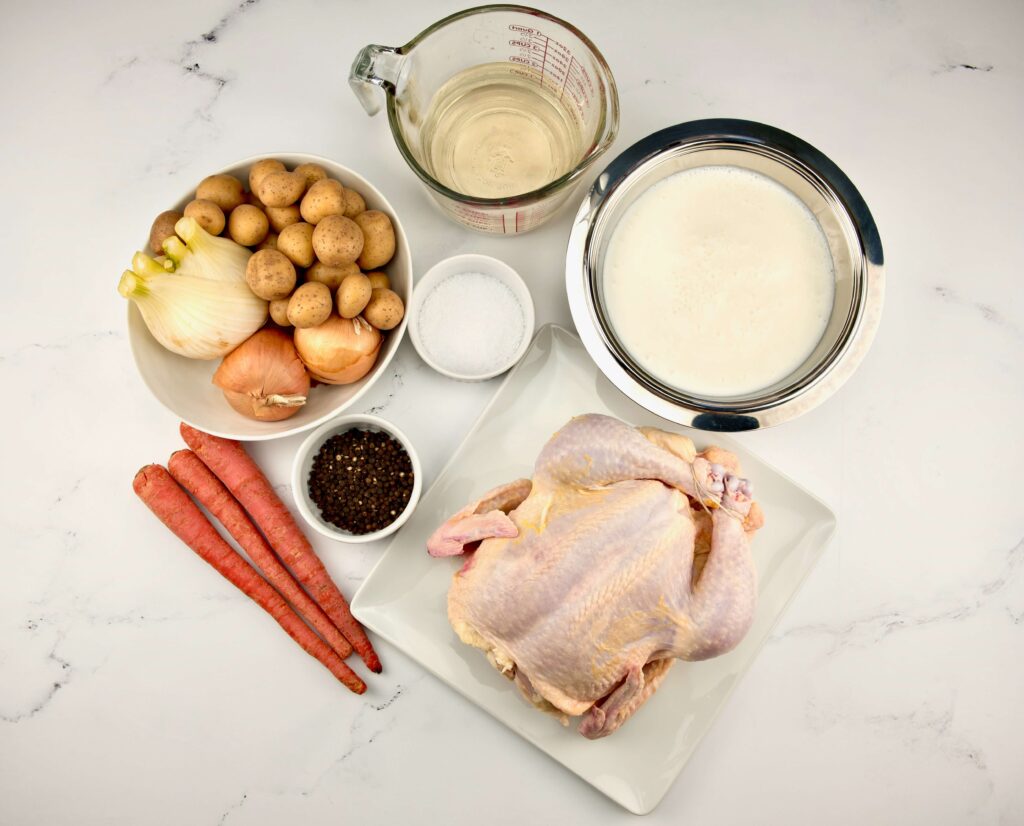
- 1 whole chicken
- 2 ½ cups (590mL) buttermilk
- 1 cup (250g) plain full-fat Greek yogurt
- 3 tablespoons (55g) kosher salt
- 2 medium onions
- 3 medium carrots
- 2 cups (300g) whole fingerling potatoes
- 1 medium bulb fennel
- 1 bottle dry white wine plus 2 cups (500mL) chicken stock or water (If you prefer not to use wine, you may substitute 6 cups, or 1 ½ liters, chicken stock or water)
- Kosher salt and freshly-ground black pepper
Step by Step Instructions
Step 1
- Mix the buttermilk, yogurt, and salt together until well combined. Add the chicken to the resealable bag, and pour the buttermilk mixture over it. Press the air out of the bag, ensuring that the mixture is evenly distributed. Place the bag on a small sheet pan or inside a mixing bowl, and leave it to marinate overnight on the lowest shelf of your refrigerator, turning once or twice if you think of it.
Step 2
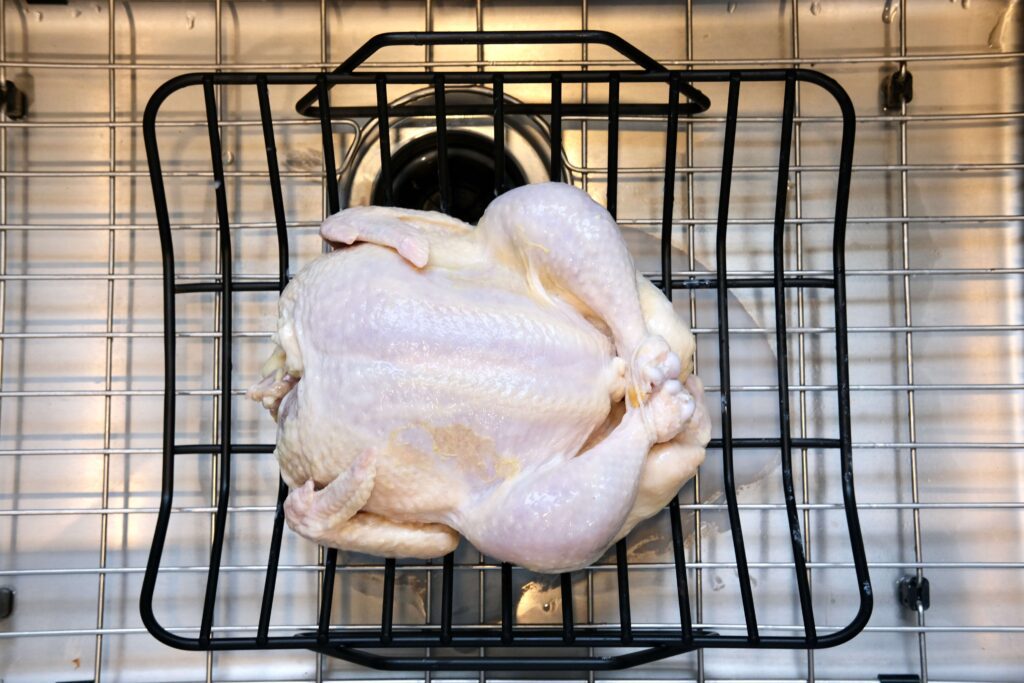
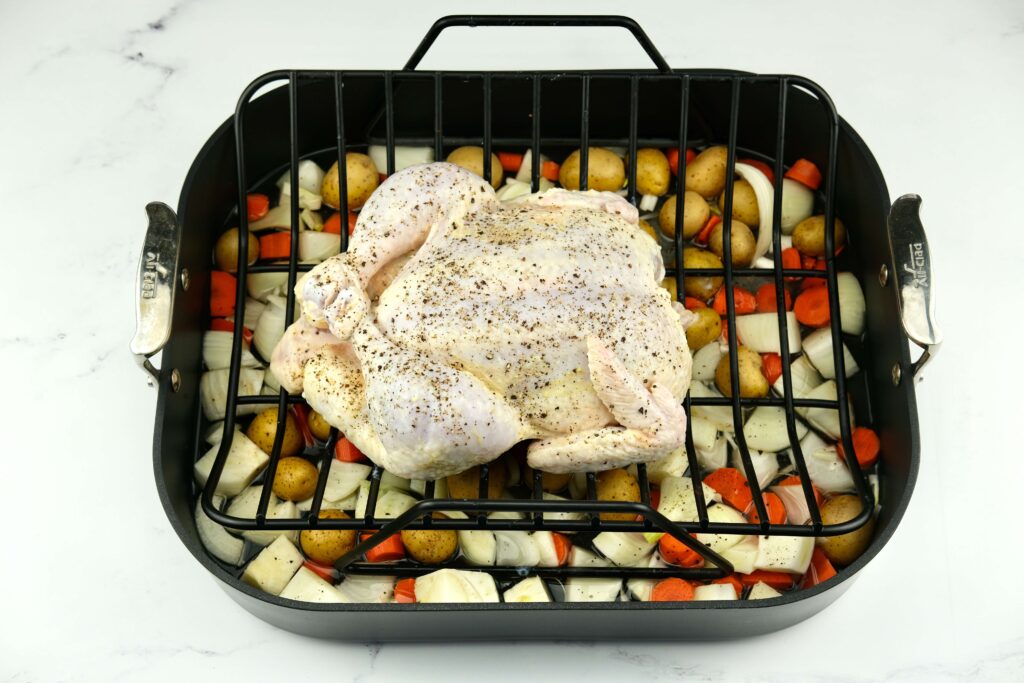
- Remove chicken 30 minutes before you are ready to roast, so that it can come to room temperature. Place the chicken on a roasting rack, and let the buttermilk drain over your sink (do not rinse the chicken). Gently pat dry with paper towels. While your chicken comes to room temperature, proceed to Step 3.
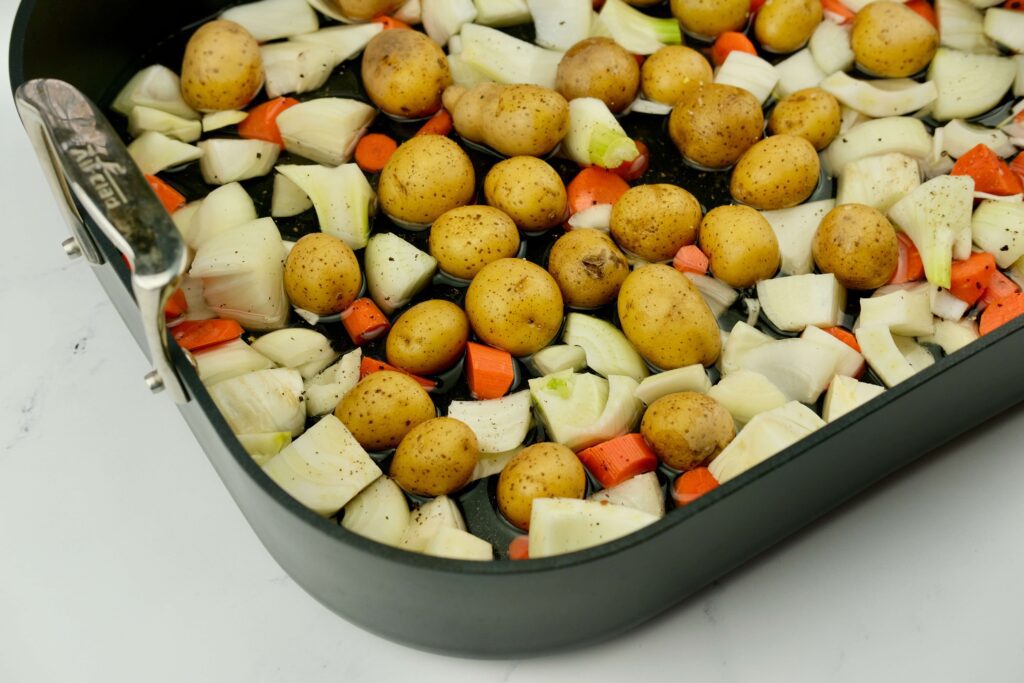
Step 3
- In a roasting pan that will fit your roasting rack, roughly chop your vegetables into large-ish, bite-sized pieces, and mix them together in the pan. Add the wine or stock (the pan should be large enough so that the wine does not completely cover the vegetables). Season the vegetables with salt and pepper.
Step 4
- Preheat your oven temperature to 425ºF or 220ºC (if you have a convection oven, use the convection setting, which will more evenly distribute the hot air).
Step 5
- Season the chicken with black pepper on both sides. It will not require salt, since it was brined in a salt mixture, but you can sprinkle some salt on the skin anyway if you like. Place the chicken and rack on top of the vegetables. You may tie the legs with kitchen string if desired.
Step 6
- Roast the chicken on the center rack of the oven for 20 minutes, then lower the temperature to 400ºF (200ºC) and continue roasting for 10 minutes. Remove the chicken from the oven at this point, and return the temperature to 425ºF (220ºC).
Step 7
- Turn the chicken over so that it is now breast-side up, roast for another 20 minutes, lower the temperature again to 400ºF (200ºC) and roast for 10-15 minutes more, or until a thermometer inserted into the deepest part of the thigh reaches 165ºF (74ºC) and the juices run clear.

- If at any point during roasting the skin becomes too dark, you may tent it with aluminum foil. Allow the meat to rest for at least 15 minutes before serving.